Finishing off
After you have defined the chronology and pressed Finish, there are just a few things left to do:
- Create some instructions about how you want particular columns to be used
- Decide whether you want to protect the chronology with a password
- Update, create or delete any Author Notes
- Save the file
User instructions
|
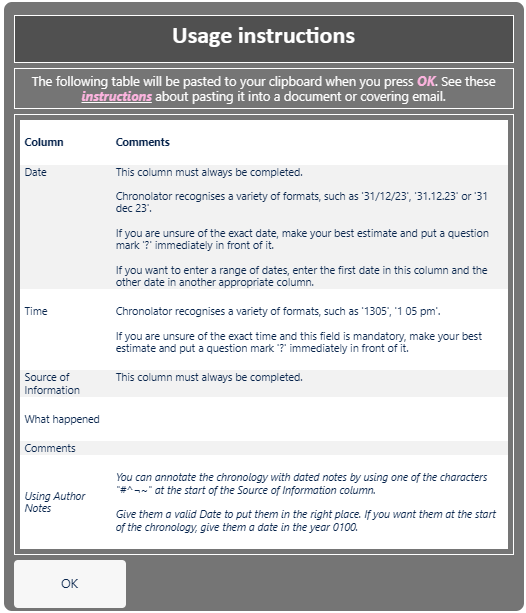
It makes sense to tell people how you expect each column to be used. You can press Chronologies > Column descriptions to generate an Information Table like this with a description of each column, including any information about how Chronolator will process it. When you press OK, the information is copied into your Clipboard. You can then paste it into a new email or document. |
|
|
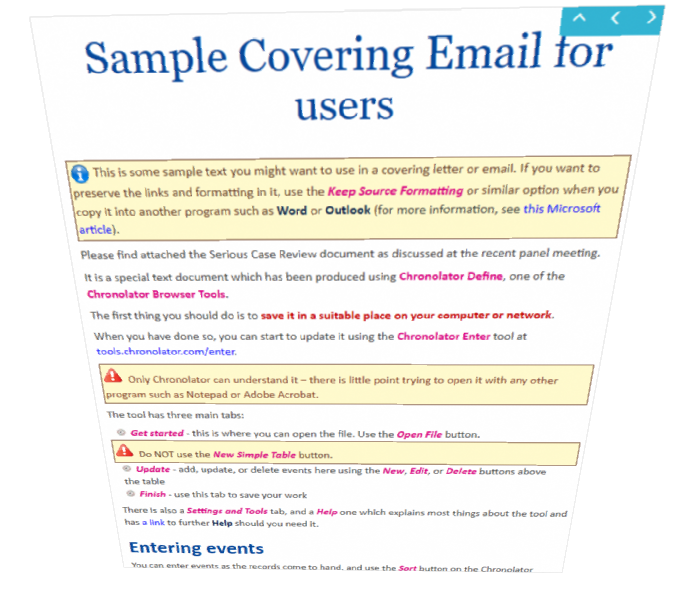
You might also want to make use of the sample email in the online Help. You can open it directly by pressing Chronologies > Covering email. Copy it, and paste it into a new email or document. |
|
You can update the pasted Information Table and Sample Covering Email with any information or instructions you want to include.
Preserving formatting and hyperlinks when pasting
In an Office file, use the Paste button on the Home tab, or press Ctrl+V.
Excel and Google Docs
Excel and Google Docs should automatically preserve formatting when pasting.
Microsoft Word and Outlook email
In Word and Outlook, you need to ensure that you paste using the Keep source formatting option on the small Paste Options pop-up menu

(for more information, see the Microsoft article at tinyurl.com/paste-into-word).
Password Protection
If you want to protect the chronology with a password, use Options > Password.
Author Notes
By default, Chronolator adds some Author Notes to the chronology:
These are there to remind you what to do next. You will probably want to delete them.
 If you use an open document as a Model, any notes in the document dated in the year 0100 are copied across, and no default notes are created.
You can also add your own. Either use one of the buttons above the table, or right-click any event to display this
Context Menu:
In the Source of Information column, type a single word beginning with one of the characters # ^ ¬ ~.
You can add an Author Note wherever you like; give it a Date and Time to put it in the relevant place in the chronology. If you want it to be at the start of the chronology give it a date in the year 0100 (it will not appear in the Timeline views in Chronolator Review).
Save the file
Use Save As > txt to save as txt or Save As > JSON to save as JSON.
 You must save as txt if you want to use a password.

