
Conducting a review |
|


Conducting a Review
.png) Since Version 6.00, the Chronolator Browser Tools include everything you need for a review. You no longer need Chronolator for Word.
Since Version 6.00, the Chronolator Browser Tools include everything you need for a review. You no longer need Chronolator for Word.
Since Version 10.00, the Chronolator Browser Tools are able to process standard Word docx files. This means that you can ask your partner agencies to complete their chronologies in Word instead of using Chronolator Enter if they prefer (though they will lose the benefits of Chronolator's error checking, date formatting and other features).
This topic is a brief overview of the tasks involved in conducting a review, and the Chronolator Browser Tools you can use to help.
1.Create a new chronology using Chronolator Define.
2.Circulate it to your partner agencies, and get them to use Chronolator Enter to update it.
3.When they return it to you, use Chronolator Integrate to merge it with other chronologies.
4.Review the integrated chronology with Chronolator Review.
The rest of this document has more information about each task.
1. Create a new chronology using Chronolator Define
|
Action |
Comments |
|
|
Open Chronolator Define in a browser (such as Chrome or Firefox) |
|
|
|
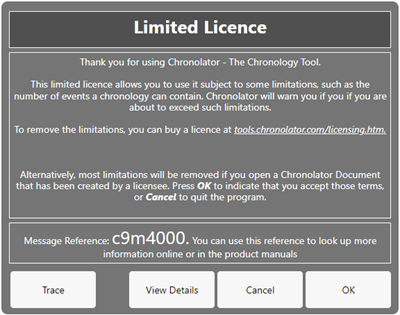
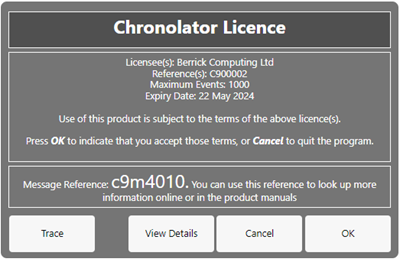
Check the licence that is displayed. It will look like one of those pictured here.
If it is a Limited Licence as shown in the first picture, you will need to install your licence.
|
|
|
|
Don't worry if you pressed OK to accept the licence without checking. The licensee is displayed in a yellow box on the Ribbon.
|
|
|
|
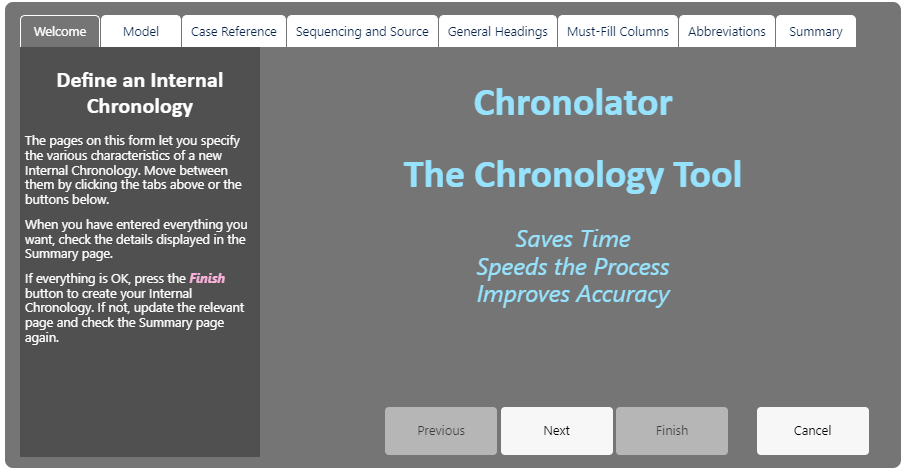
Press File > Chronologies > New to display the Case Details Wizard. |
|
|
|
Complete the Case Details Wizard. See the Case Details Wizard topic for details. |
|
|
|
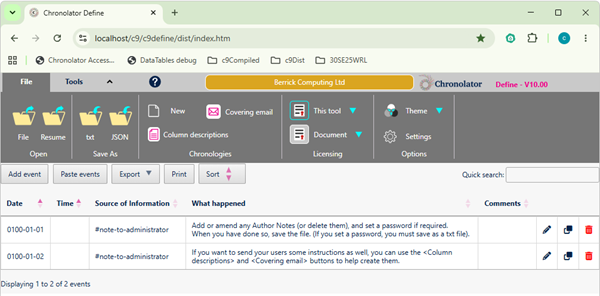
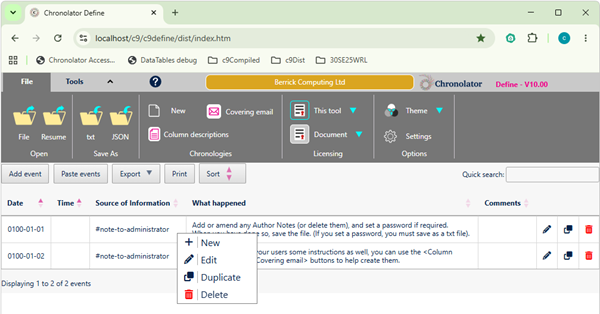
When you press Finish in the Case Details Wizard, the chronology is created and opens below the Ribbon. It contains some Author Notes about what to do next. |
|
|
|
Update or delete the Author Notes.
|
|
|
|
Press Tools > Password if you want to add a password. |
|
|
|
Press one of the buttons in the File > Save As group to save the document in the location of your choice.
|
|
|
|
|
||
|
Use the Covering email and Column descriptions buttons in the File > Chronologies group to create some instructions to accompany the chronology. |
|
|



.png)



2. Circulate the chronology and instructions to your partner agencies, and get them to use Chronolator Enter to update it
Send the instructions and document you just created by any convenient means - email, file sharing etc.
Include a link to tools.chronolator.com/enter.
Some partner agencies might still prefer to use Microsoft Word for data entry. If so, you can create a suitable Word document for them by pressing the Export > docx button above the table. See Chronolator and docx files for more details.
Note that they will lose the benefits of Chronolator's error checking, date formatting and other features.
3. Create an Integrated Chronology with Chronolator Integrate
As and when agencies return their chronologies, use Chronolator Integrate to merge them into an integrated chronology. You will find it at tools.chronolator.com/integrate.
4. Send the document to the reviewer
When you have finished the chronology, send the resulting file for review. Tell the reviewer about the Chronolator Review tool, and let them know about its powerful search features, Timeline displays, and how effective it can be in presentations and meetings. These links will be useful:
 www.chronolator.com/videos/reviewers-overview (a video demonstrating the tool).
tools.chronolator.com/review (the tool itself, which includes a sample file to help explore its features).
tools.chronolator.com/review/help (the Help for the tool. In particular, the Familiarising Yourself section would be useful).
Copyright © Berrick Computing Ltd 2026