Familiarising Yourself
The easiest way to find out what Chronolator Integrate can do is to use some sample files. Go to www.chronolator.com/downloads/samples and follow the instructions there to download some. They include some Internal Chronologies and a Composite Chronology.
This section suggests a few of the things you might try, and along the way introduces some of the terms used in the tool.
Get Started
|
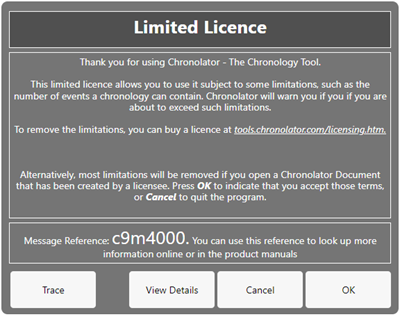
When you first open the tool a licence will be displayed; usually a Limited Licence like this.
|
|

Start a new Composite Chronology
|
After you accept the licence terms, the Ribbon is displayed. Click on File > Import. |
|

|
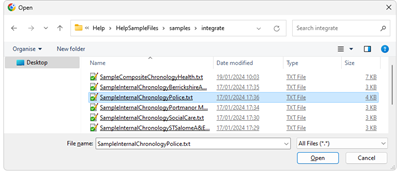
Choose one of the sample files - SampleInternalChronologyPolice.txt, say. |
|
|
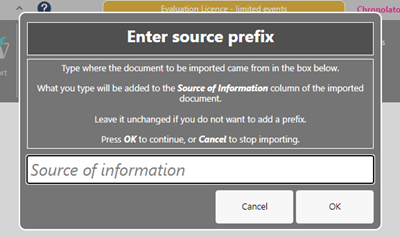
The Enter source prefix dialog is displayed |
|
|
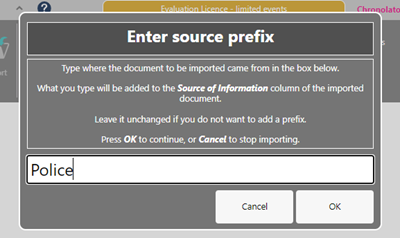
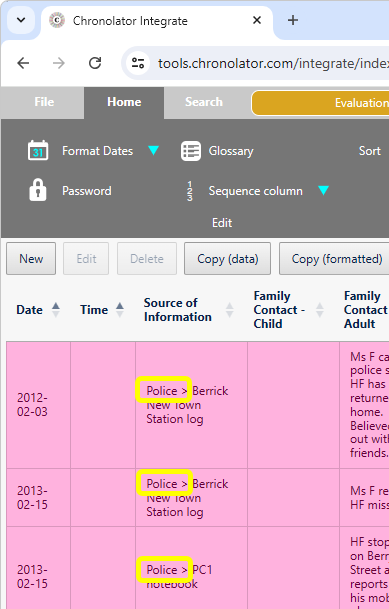
Type Police |
|
|
Notice:
|
|
|
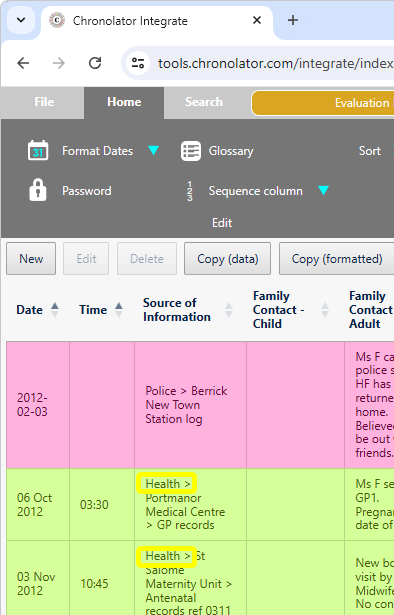
Import another chronology (press File > Import again) and give it a suitable prefix. In this example, we have imported SampleCompositeChronologyHealth.txt with prefix Health |
|
Like the other Chronolator Browser Tools, Chronolator Integrate automatically saves your work in the Browser. If you close and reopen your browser, you can use File > Resume to pick up where you left off.
 Although Browser storage is quite robust and roomy, you should save your work to the file system from time to time to protect yourself against system failure.
Using the other buttons on the Ribbon
See the Ribbon topic for other buttons and controls on the Ribbon which allow you to save files, change the appearance of the tool and the colours used to highlight different Sources of Information, view information about and search the chronology, format dates, set a password and so on.
Using the buttons above the table
Sort
By default, the events in the table are in Date / Time order. You can sort the table by different columns if you want.

For example, clicking on Source of Information in the table header row will sort the table by agency, in ascending order. Clicking it again will sort in descending order.
To go back to date order, just click Date in the table header row.
To sort by multiple columns, hold the Shift key as you click on a heading.
Quick Search
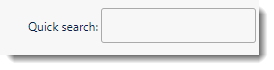
You can use the box in the top right corner of the Presentation Area to search for text. Only those events that contain your search terms are displayed.
Searches are cumulative - the more terms you enter, the fewer events are displayed. This can provide a powerful way to sift through desired events.
Try searching for Ms F - only the events in which she plays a part are shown.
Next, add midwife to the search - Ms F's interactions with midwives are shown.
 Quick Search only searches the Table presentation. Use Search > Criteria to search across all presentations (see Searching and filtering events for details).
Editing, copying, and printing events

The buttons between the table and the Ribbon let you add, change, or delete events, copy them to the Clipboard, or print them.
You must click an event to select it before using the Edit or Delete buttons.
You can also invoke the Editor commands by right-clicking on an event to display this : 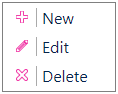
See Using the Clipboard for information about copying to the Clipboard.
When you press the Print button, the chronology table is displayed in a new browser tab. Use the browser's print facilities to print it to a physical printer or save it as a PDF or other file.