Using a Sequence Column
The first column in a chronology table can be a Sequence column. This provides two main benefits:
- it can contain a reference number for each event
- you can use it to specify the order of events on a particular day when you do not know their times
Defining a Sequence Column
The Case Review Administrator can define a Sequence column when setting up the chronology document.
You can define one using File > Edit > Sequence column (this is the only change Chronolator allows to Administrator-defined column headings).
When adding a column this way, it is automatically populated with sequence numbers.
Updating Sequence Numbers
When you first add a Sequence column, Chronolator automatically adds a sequence number to each event.
Later, you can update the numbers at any time - for example, if some events are added or removed.
- Press File > Edit > Sequence column
and then
- Press Update - sequential to give each event a unique number or Update - group by day to start the numbering at 1 on each new day
- Press Clear to delete the numbers in the column
Deleting a Sequence Column
Press File > Edit > Sequence column > Delete column.
Forcing events into order
Sometimes you might not know at what time events happened on a particular day, but you do know their order. You can use the Sequence column to specify it.
|
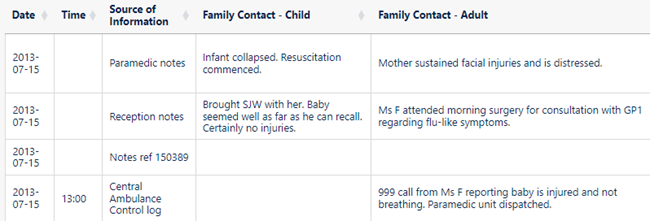
In this example from a multi-agency chronology, the time has only been given for one of the events of July 15 (2013-07-15), and events are in the wrong order (in the first one an infant has collapsed, while in the second he seemed well): |
|
|
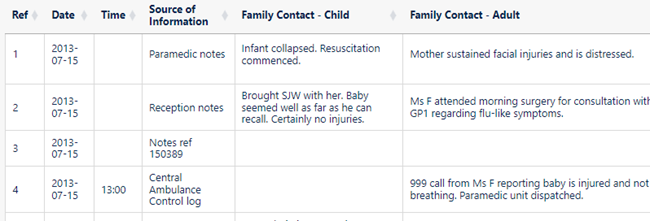
We can put them in the right order by adding a Sequence column ... |
|
|
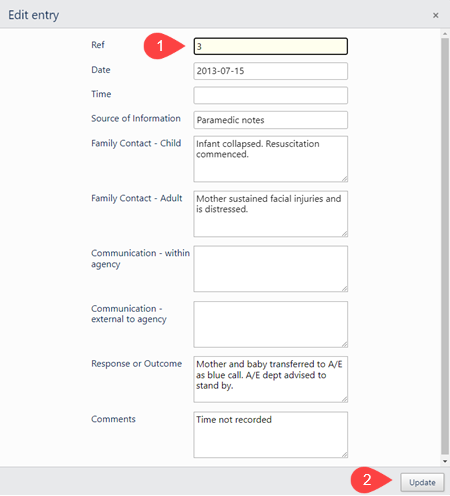
... and editing each event, putting the desired sequence number in it: |
|
|
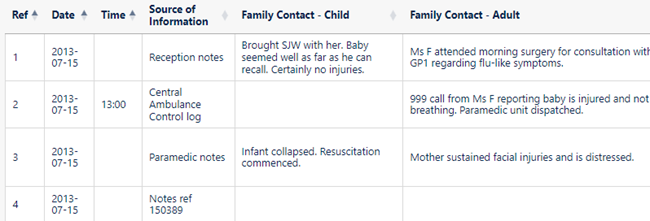
When you press Update, the event will be put in the correct place (in this picture, we have edited all the required events) |
|
You do not always have to update sequence numbers in all the events, as the sort recognises decimal numbers. For example, suppose that you now wanted to put event 4 before event 2 (this might not make sense in terms of the story, but we will do it here just to illustrate the feature).
|
Replace the 4 in the event with a number between 1 and 2 - 1.5 say: |
|
|
When you press Update, the event will be put in the correct place ... |
|
|
... and then you can update the numbers as described above. |
|


