Update
When you click on the Update tab, it hides the Banner and expands to include buttons that allow you to:
- Format dates and times
- Sort the events into chronological order
- Check the chronology for errors
- Update or Clear the numbers in the Sequence Column if there is one
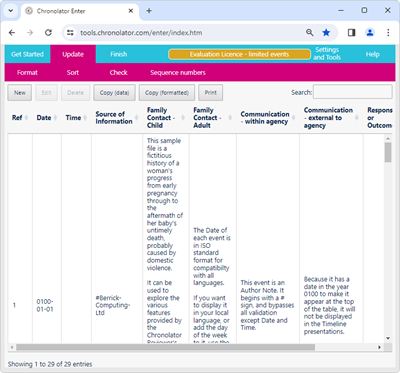
The Presentation Area displays the chronology, together with further buttons to add, change, and delete events, and to copy, print and search the entire chronology.
Formatting Dates and Times
If you are copying events from other records, it is likely that dates and times are in different formats. Instead of having to translate them into a consistent format yourself, you can use the Format button to do so.
You can choose from a variety of formats to use on the Settings tab.
Sorting the chronology
When you add a new event to the chronology, it is by default placed at the end of the table. Use the Sort button to put events in chronological order.
By default the chronology is sorted in Ascending order. If you want it to be sorted in Descending order, or to be sorted automatically, set the appropriate option on the Settings tab.
Checking for problems
When you create or update an event, Chronolator checks it for errors such as missing information. It will not allow you to add an invalid event to the chronology.
The Check button checks that events are in sequence. It also checks for other errors in a chronology that are normally trapped at data entry time, in case the chronology came from Chronolator for Word, which does not check as events are entered.
If there are errors, they are highlighted and message c9m3000 is displayed. The message includes a count of how many errors were found.
In addition, a Show Errors Only button is added above the table.
Adding, changing, and deleting events
The buttons between the toolbar and the chronology allow you to add, change, and delete events.
- Press New to add a new event.
- To change or delete an event, first of all select it by clicking on it. When it is selected, press Edit or Delete.
- You can also do these things by right-clicking on an event.
Copying the chronology to the clipboard
The Copy button copies the chronology table to the clipboard. See Using the clipboard for details of what you can do after you have copied it.
Printing the chronology
The Print button creates a printable version of the table (without any error highlighting) in a new browser tab. Use the browser's print facility to send the document to an actual printer.